好還要更好!新自拍神器美圖 M8 自拍實測

在自拍手機中擁有強大技術的美圖,先前所推出的新機--美圖 M8,繼承 M 系列一直以來的強大美顏 AI,而更高規格的美圖 T8 也有一些新技術釋出到這款手機上,讓小編非常的期待。之前的美圖 M6 在自拍方面已經有非常不錯的表現,美圖 M8是否會有更多的突破呢?這次小編拿到了美圖 M8,迫不及待的想試試強大的自拍功能,先來看看簡單的開箱吧。


▲ 這次小編拿到的是月光白的機子。


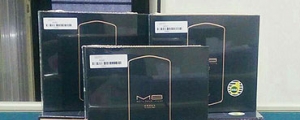
▲ 美圖 M8 基本上配件及盒內配置與美圖 M6 沒有太多差異,玫瑰金的邊線、黑色的內盒,是美圖 M 系列外盒一貫的配色。配件有連接線、保護套、保護貼、拭鏡布、變壓器,當然還有說明書。雖然沒有太華麗女氣的裝飾,但簡潔又帶有一絲少女情懷的設計,一直以來都是美圖的風格。

▲ 美圖 M8 正面的螢幕是 5.2 吋的 FHD AMOLED 螢幕。

▲ 圓弧的形狀,是 M 系列一直以來的特色。跟 M6 一樣,雙面都是玻璃面板。

▲ 與 M6 比起來,M8 尺寸稍微大了一點。

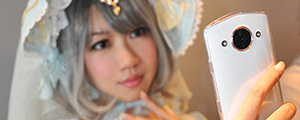
▲ 背面都是六面曲面玻璃。


▲ M8的寬度也較寬。

▲ 厚度上來說,M8 比 M6 稍微薄了一點。(上:M6,下:M8)

▲ 充電孔一樣是 USB Type-C,有 3.5 耳機孔。
外觀上說來,美圖 M8 跟 M6 長得不會差太多,有些按鍵換了位置(例如拍照快門鍵兼螢幕開關按鍵自上方移到右方等),而美圖 M8 較寬也較高較重,但是機身比較薄。如果是手較小的女孩,拿起來可能會有較明顯的感覺,會覺得拿來自拍的時候,M6 較 M8 容易掌握。


▲首先來看看成色,左邊是 M6 拍的,右邊是 M8 拍的,相同環境下,兩支手機的成色稍有不同,可以看出 M6 成色稍微偏紅,而 M8 拍來的照片,氣色較好。


▲ 接下來是美顏功能,美圖的美顏功能從 1 到 7,最低為 1 最高為 7。上圖左邊為美顏 1 的效果,右邊為美顏 7 的效果。看得出來美顏效果較高的時候,皮膚被磨得較平,顏色也較為粉嫰,但也稍嫌不自然。小編建議若要使用美顏效果,開一到四就可以了,再高就會有些不自然。


▲ 無論是拍照或人像模式,都有這些選項可以選擇。以自拍來說非常的足夠,許多細節都可以作調整。
這一次美圖 M8 新推出「人像」功能,特別將背景處理拉出來,讓使用者可以自由調整背景虛化程度,讓我們來看看其中的差異。


▲ 人像模式測試。左邊為背景虛化 0,右邊則拉到背景虛化最高,可以看出背景整個模糊了。想要營造淺景深的效果時可以使用這個功能,因為是以拉把做調整的,可以自由調整想要的虛化程度,使用起來相當方便簡單。

▲「人物」「背景虛化」,在充足光源下,即使是室內也可以得到相當不錯的效果。(此環境為玻璃門旁,因此收光是自然光而非燈光。)

▲「人物」「背景虛化」應用在合照上時,可以將雜亂的背景模糊化,藉此強調前方的拍照主體。不過也可以發現 MD 的髮飾也被模糊掉了,由此可見這項功能在辨別人物與背景的輪廓上還有改善的空間。(不過本次 MD 的髮飾較誇張因此難以辨識,一般背景虛化時較少出現這個問題)

▲ 自拍時若想要強調背景,似乎比較困難。上圖是以拍照模式(非背景虛化的人物模式)拍攝,但可以看出來後方的人物並不清楚。但以自拍機來說這樣的效果已經很不錯了。
以上為人物自拍的部分,接下來來看看拍攝其他主體時的表現如何:


▲ 拍食物效果來說差強人意,成色算是 ok,但非常吃環境光源。台灣小吃部分是晚上日光燈下拍的,明顯比起有自然光時表現差很多。如果是美食部落客要用來寫文的話,建議加一隻簡單的持續燈,就會得到很好的效果。


▲拍景部分來說,因為沒有廣角,在拍比較大的景的時候會有拍不下的狀況出現。但以平常記錄生活來說,算是可以接受,成色及清晰度,還有收光等等都在小編可以接受的範圍之內。
而新增加的「人物」拍攝功能(背景虛化),虛化的程度是用拉把來調整,完全可以自行控制模糊的程度,個人覺得相當好用。唯一的問題是,這個功能只能運用在自拍上(前鏡頭),後鏡頭完全無法使用這個功能,這是有點可惜的。
成像部分,自拍當然不用說,每個使用者都可以變美又不會太不自然。而拍景與食物時,如圖說所描述,相當仰賴環境光源(當然你可以直接使用內建的閃光燈) 。夜拍、室內拍景,都有不錯的表現,但在白天拍景的部分,層次感稍嫌不足。另外,小編使用起來最大的問題是,對焦需要較長的時間,因此拍靜態的景是 OK 的,但若是有動態的話,光是等對焦就要花一會兒的時間,更不要說捕捉動態的東西了。
雖然美圖 M8 台灣尚未上市,台版價格並未公佈,但 M 系列的價格一般落在一萬三上下,以這樣的價格來說,小編覺得這樣的外型及拍照表現算是很 OK 了。雖然比不上旗艦機種有強大的 CPU,但若是買來當作自拍專用機,美圖 M8 絕對可以勝任。一般的社群 APP、簡單的小遊戲,美圖 M8 都可以順暢的使用,因此如果不是有極耗資源的手遊需求,當主要用機美圖 M8 也是綽綽有餘的。
延伸閱讀:自拍美顏玩背景!Meitu M8 開箱實測
美圖 M8 開箱&與 M6 之外型比較


▲ 這次小編拿到的是月光白的機子。


▲ 美圖 M8 基本上配件及盒內配置與美圖 M6 沒有太多差異,玫瑰金的邊線、黑色的內盒,是美圖 M 系列外盒一貫的配色。配件有連接線、保護套、保護貼、拭鏡布、變壓器,當然還有說明書。雖然沒有太華麗女氣的裝飾,但簡潔又帶有一絲少女情懷的設計,一直以來都是美圖的風格。

▲ 美圖 M8 正面的螢幕是 5.2 吋的 FHD AMOLED 螢幕。

▲ 圓弧的形狀,是 M 系列一直以來的特色。跟 M6 一樣,雙面都是玻璃面板。

▲ 與 M6 比起來,M8 尺寸稍微大了一點。

▲ 背面都是六面曲面玻璃。


▲ M8的寬度也較寬。

▲ 厚度上來說,M8 比 M6 稍微薄了一點。(上:M6,下:M8)

▲ 充電孔一樣是 USB Type-C,有 3.5 耳機孔。
外觀上說來,美圖 M8 跟 M6 長得不會差太多,有些按鍵換了位置(例如拍照快門鍵兼螢幕開關按鍵自上方移到右方等),而美圖 M8 較寬也較高較重,但是機身比較薄。如果是手較小的女孩,拿起來可能會有較明顯的感覺,會覺得拿來自拍的時候,M6 較 M8 容易掌握。
美圖 M8 拍照實測
那麼,M 系列最重要的拍照功能表現如何呢?最近強調自拍功能的手機一隻一隻的出,美圖身為其中的龍頭之一,自拍功能自然是最重要的特色之一。

▲首先來看看成色,左邊是 M6 拍的,右邊是 M8 拍的,相同環境下,兩支手機的成色稍有不同,可以看出 M6 成色稍微偏紅,而 M8 拍來的照片,氣色較好。


▲ 接下來是美顏功能,美圖的美顏功能從 1 到 7,最低為 1 最高為 7。上圖左邊為美顏 1 的效果,右邊為美顏 7 的效果。看得出來美顏效果較高的時候,皮膚被磨得較平,顏色也較為粉嫰,但也稍嫌不自然。小編建議若要使用美顏效果,開一到四就可以了,再高就會有些不自然。


▲ 無論是拍照或人像模式,都有這些選項可以選擇。以自拍來說非常的足夠,許多細節都可以作調整。
這一次美圖 M8 新推出「人像」功能,特別將背景處理拉出來,讓使用者可以自由調整背景虛化程度,讓我們來看看其中的差異。


▲ 人像模式測試。左邊為背景虛化 0,右邊則拉到背景虛化最高,可以看出背景整個模糊了。想要營造淺景深的效果時可以使用這個功能,因為是以拉把做調整的,可以自由調整想要的虛化程度,使用起來相當方便簡單。

▲「人物」「背景虛化」,在充足光源下,即使是室內也可以得到相當不錯的效果。(此環境為玻璃門旁,因此收光是自然光而非燈光。)

▲「人物」「背景虛化」應用在合照上時,可以將雜亂的背景模糊化,藉此強調前方的拍照主體。不過也可以發現 MD 的髮飾也被模糊掉了,由此可見這項功能在辨別人物與背景的輪廓上還有改善的空間。(不過本次 MD 的髮飾較誇張因此難以辨識,一般背景虛化時較少出現這個問題)

▲ 自拍時若想要強調背景,似乎比較困難。上圖是以拍照模式(非背景虛化的人物模式)拍攝,但可以看出來後方的人物並不清楚。但以自拍機來說這樣的效果已經很不錯了。
以上為人物自拍的部分,接下來來看看拍攝其他主體時的表現如何:


▲ 拍食物效果來說差強人意,成色算是 ok,但非常吃環境光源。台灣小吃部分是晚上日光燈下拍的,明顯比起有自然光時表現差很多。如果是美食部落客要用來寫文的話,建議加一隻簡單的持續燈,就會得到很好的效果。


▲拍景部分來說,因為沒有廣角,在拍比較大的景的時候會有拍不下的狀況出現。但以平常記錄生活來說,算是可以接受,成色及清晰度,還有收光等等都在小編可以接受的範圍之內。
美圖 M8 測試心得
這次主要測試的是拍照的部分,平心而論,美圖 M8 在自拍方面是目前小編用過所有美顏自拍機中最自然的,強大的美顏 AI,讓使用者呈現出自然的好氣色,而眼睛放大、輪廓較正、消除陰影等美顏機常出現過於 over 的效果,在美圖 M8 上幾乎是不會出現(不過相較之下,修正的效果就不會太明顯。)若是想追求吉娃娃般的眼珠、極尖的錐子臉等等的效果,那美圖 M8 可能無法滿足這樣的需求。而新增加的「人物」拍攝功能(背景虛化),虛化的程度是用拉把來調整,完全可以自行控制模糊的程度,個人覺得相當好用。唯一的問題是,這個功能只能運用在自拍上(前鏡頭),後鏡頭完全無法使用這個功能,這是有點可惜的。
成像部分,自拍當然不用說,每個使用者都可以變美又不會太不自然。而拍景與食物時,如圖說所描述,相當仰賴環境光源(當然你可以直接使用內建的閃光燈) 。夜拍、室內拍景,都有不錯的表現,但在白天拍景的部分,層次感稍嫌不足。另外,小編使用起來最大的問題是,對焦需要較長的時間,因此拍靜態的景是 OK 的,但若是有動態的話,光是等對焦就要花一會兒的時間,更不要說捕捉動態的東西了。
雖然美圖 M8 台灣尚未上市,台版價格並未公佈,但 M 系列的價格一般落在一萬三上下,以這樣的價格來說,小編覺得這樣的外型及拍照表現算是很 OK 了。雖然比不上旗艦機種有強大的 CPU,但若是買來當作自拍專用機,美圖 M8 絕對可以勝任。一般的社群 APP、簡單的小遊戲,美圖 M8 都可以順暢的使用,因此如果不是有極耗資源的手遊需求,當主要用機美圖 M8 也是綽綽有餘的。
延伸閱讀:自拍美顏玩背景!Meitu M8 開箱實測
廣告

網友評論 0 回覆本文