挑戰旗艦級拍照表現的 OPPO Reno13 Pro!水下拍攝也難不倒
OPPO 近期在台灣積極地推出新機,包含旗艦級的 Find X8 Pro、Find X8 還有均衡的國民機種 Reno13 Pro 以及 Reno 13,其中 Find X8 和 Reno13 Pro 是不少人在購機時的兩難,到底該直上有哈蘇加持的 Find X8 系列,還是入手 Reno13 Pro 呢?接下來我們就從拍照表現來分享兩台機種的差異吧!
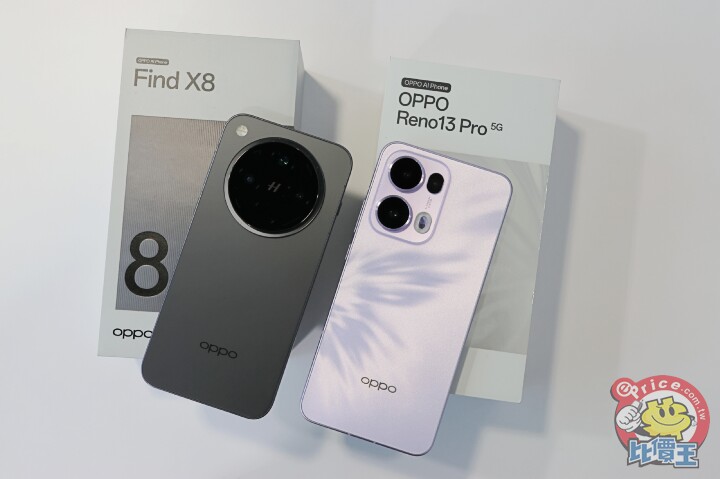
▲左:OPPO Find X8,右:OPPO Reno13 Pro。
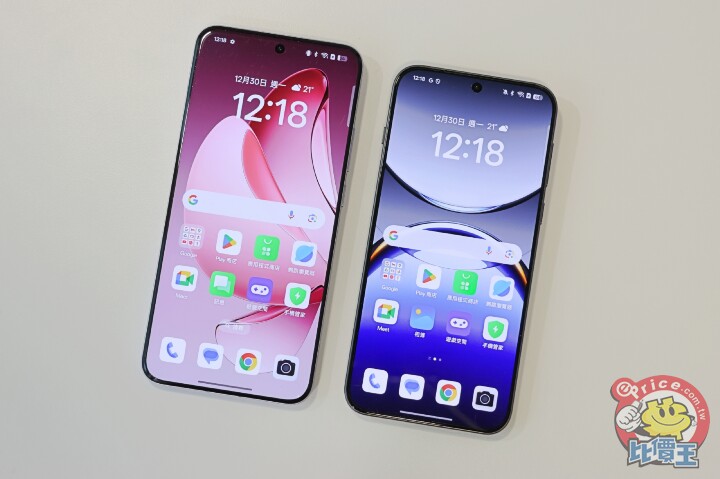
▲左為 6.83 吋配備懸浮螢幕的 OPPO Reno13 Pro,右為 6.59 吋的 OPPO Find X8。
OPPO Find X8 和 Reno13 Pro 相機都是採用超廣角、廣角、長焦三鏡頭配置,Find X8 採用 5000 萬畫素 f/1.8 主鏡頭(1/1.56 吋感光元件、24mm 等效焦距)、5000 萬畫素 f/2.6 三倍潛望式長焦鏡頭(1/1.95 吋感光元件、73mm 等效焦距)、5000 萬畫素 f/2.0 超廣角鏡頭(1/2.75 吋感光元件、15mm 等效焦距);而 Reno13 Pro 則是採用 5000 萬畫素 f/1.8 主鏡頭(1/1.56 吋感光元件、24mm 等效焦距)、5000 萬畫素 3.5x 倍潛望式長焦鏡頭(80mm 等效焦距)、800 萬畫素 f/2.0 超廣角鏡頭。
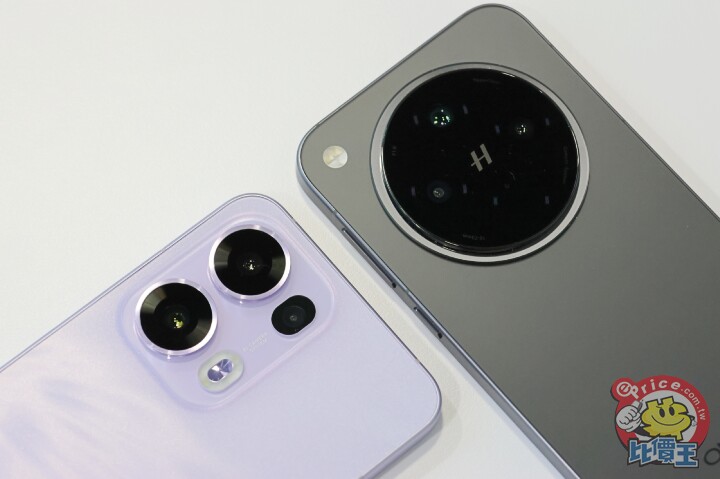
▲Reno13 Pro 和 Find X8 一樣都採用三鏡頭配置,滿足使用者從超廣角到望遠的拍攝需求。
單從鏡頭配置來說,兩款機型的設計概念滿相近的,可以滿足消費者日常拍攝的需求,特別是配置了潛望式長焦鏡頭,在兼顧機身輕薄的同時又能拍得更遠更清晰,適合用在拍攝演唱會或是球賽,捕捉歌手或球員更清晰。
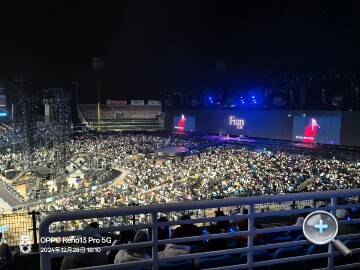
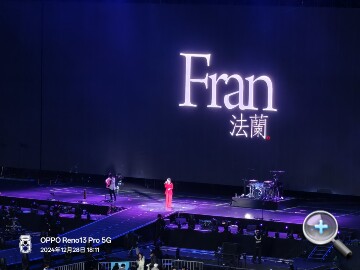
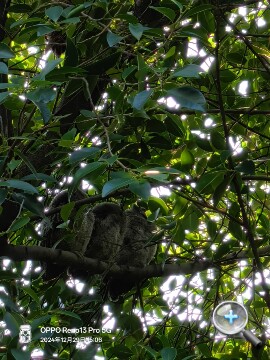
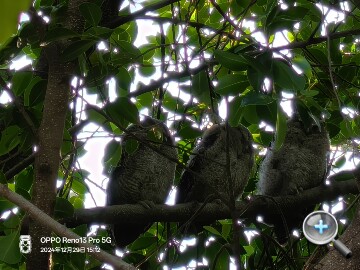
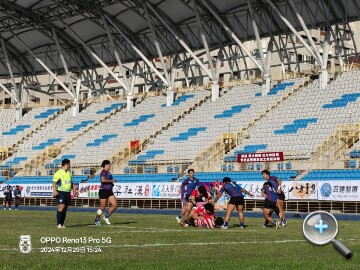
主鏡頭部分 Find X8 和 Reno13 Pro 皆採用 1/1.56 吋的大感光元件,拍攝表現也頗相似,整體發色偏向明亮色調感,不會太過鮮豔,特別是在人像拍攝上,在人物膚色處理和背景散景過渡處理得非常好,很能拍出雜誌大片感,主要差異則是有無哈蘇風格和 X-Pan 模式可以套用,就這點來說 OPPO 在 Reno13 Pro 的配置上真的是滿大方的,直接上看 Find X8 規格,讓使用者可以體驗旗艦級的拍攝感受。
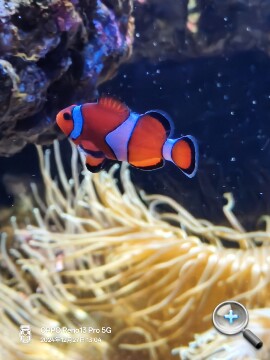
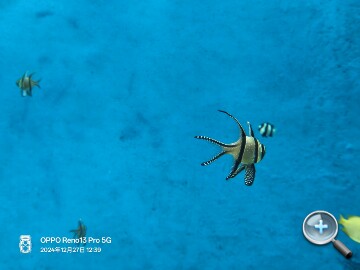
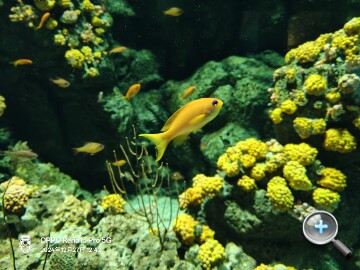
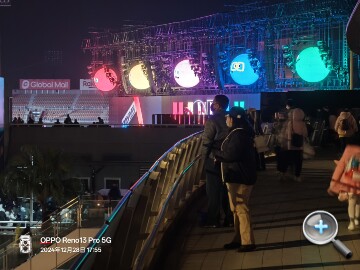
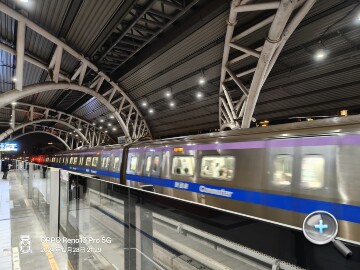
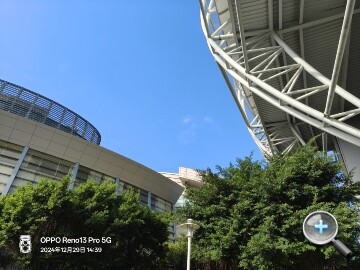
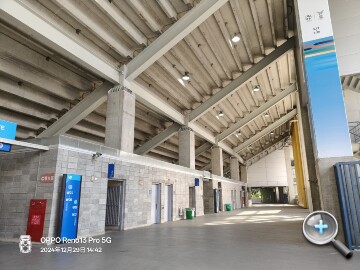
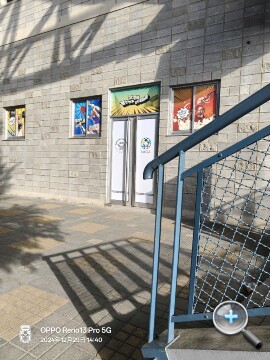
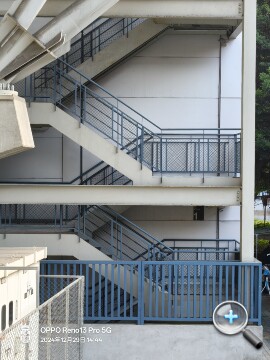

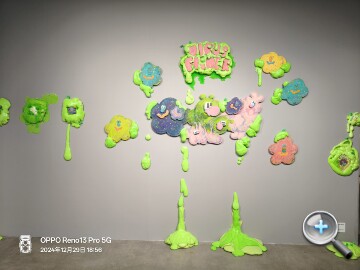
提供幾組 Reno13 Pro 和 Find X8 拍攝對比照供參考,看浮水印就可以知道是由 Reno13 Pro 或是 Find X8 拍攝,在同個場景下,如果是用主鏡頭拍攝兩者的表現還滿相近的,長焦鏡頭的表現 Find X8 在哈蘇加持和演算法調整之下,虛化效果更明顯且自然,不過 Reno13 Pro 表現也不俗,同樣能拍出高品質人像照。


▲主鏡頭拍攝。


▲長焦鏡頭拍攝。


▲主鏡頭拍攝。


▲主鏡頭拍攝。

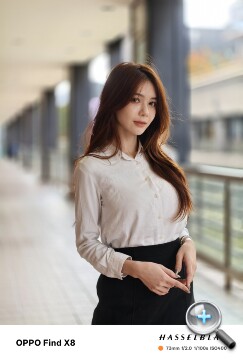
▲長焦鏡頭拍攝。

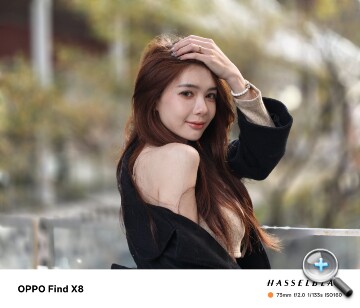
▲長焦鏡頭拍攝。
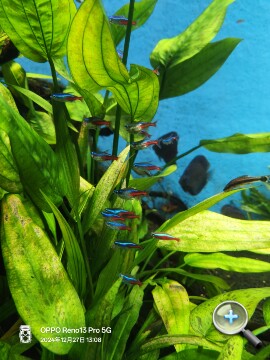
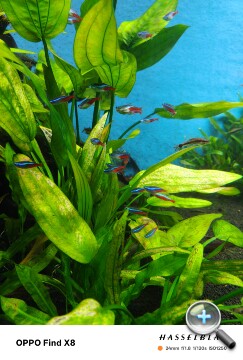
▲主鏡頭拍攝。
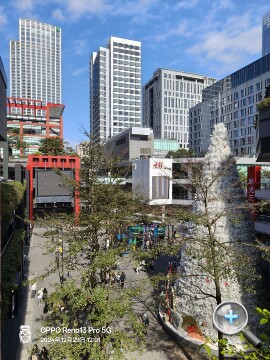
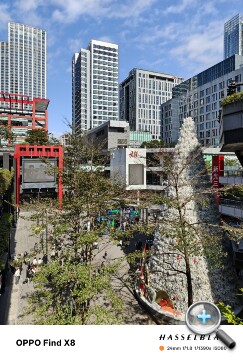
▲主鏡頭拍攝。

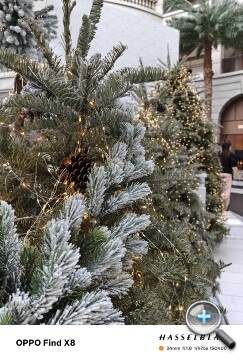
▲主鏡頭拍攝。


▲長焦鏡頭拍攝。


▲主鏡頭拍攝。
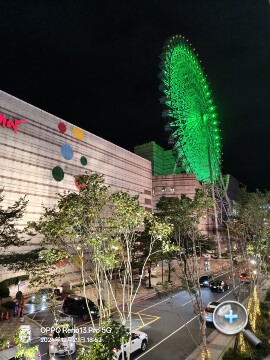
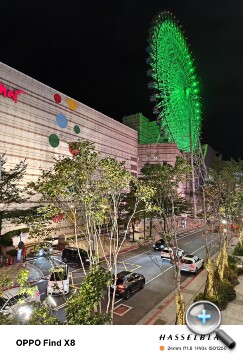
▲主鏡頭拍攝。
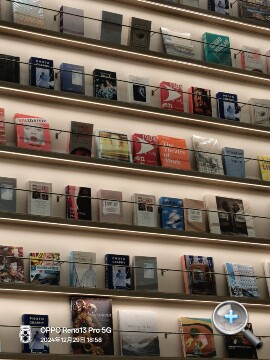

▲長焦鏡頭拍攝。
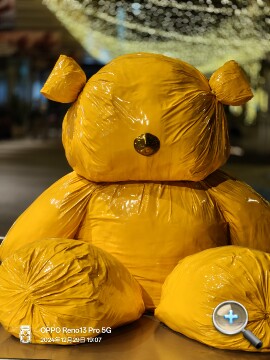
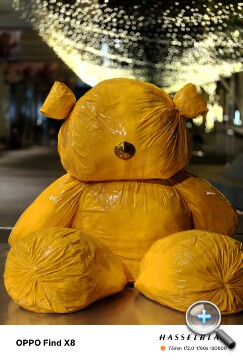
▲長焦鏡頭拍攝。
此外,Reno13 Pro 新增實況照片功能,按一下拍攝選單上的圓圈就可以拍攝實況照片,保留約三秒當時拍攝的動態場景。
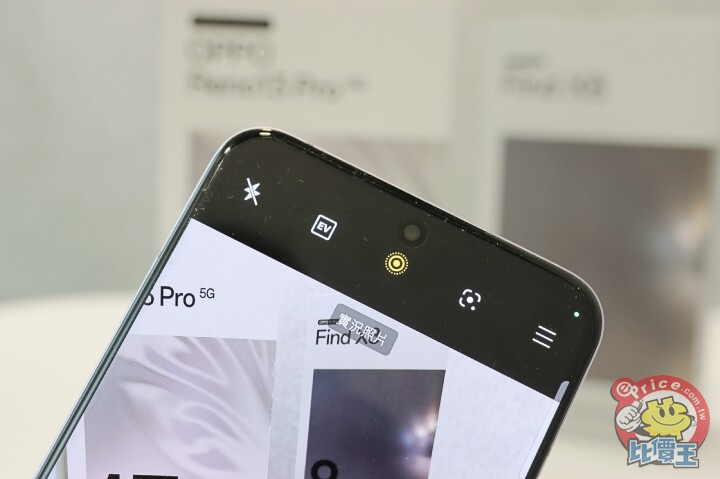
OPPO Reno13 Pro 不少功能直接上看旗艦級的 Find X8,特別是在 AI 應用方面,跟隨著 OPPO 的 AI 政策,在手機裡加入眾多生成式 AI 功能,比方說 AI 寫真館 2.0,只要上傳一張自拍照,AI 就會自動判斷照片中的人臉輪廓,這時候只要選擇自己想要轉換的照片風格就可以得到一組全新的 AI 照片了。
購買 OPPO Reno13 Pro 登入 OPPO 帳號之後,OPPO 就會先贈送 5000 點點數可以體驗 AI 寫真館 2.0 功能,每天簽到的話可以領取更多點數,每生成一組 AI 照片需要十點,只要選擇一張想要生成的照片,按下「開始產生」後,AI 寫真館 2.0 就會自動產生一組選定的照片風格。
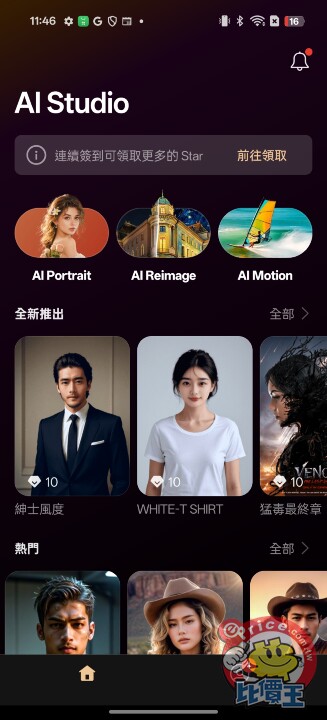

像是不論要產生狂歡節風格的照片,或是把自己的頭像套用英倫風格都可以。


Reno13 Pro 和 Find X8 一樣,具備豐富的 AI 修圖功能,包含 AI 畫素超高解析度、AI 消除拖影、AI 消除反光等。
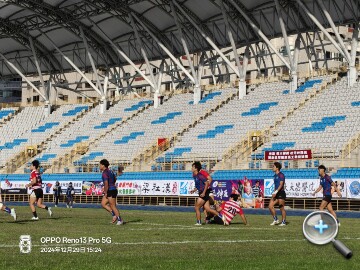
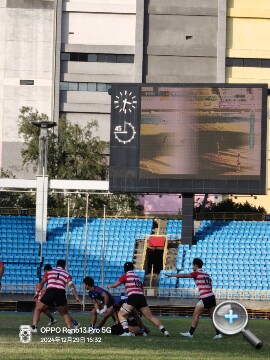
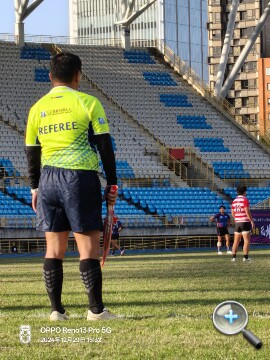
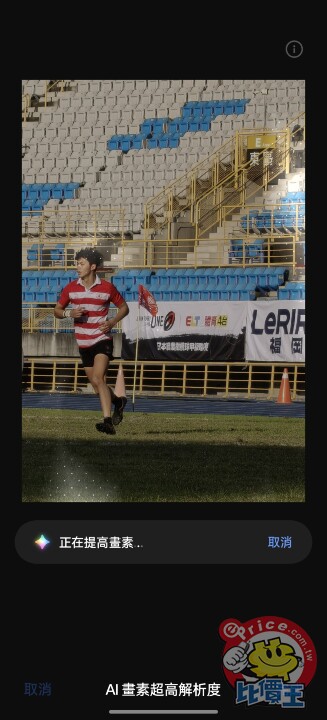
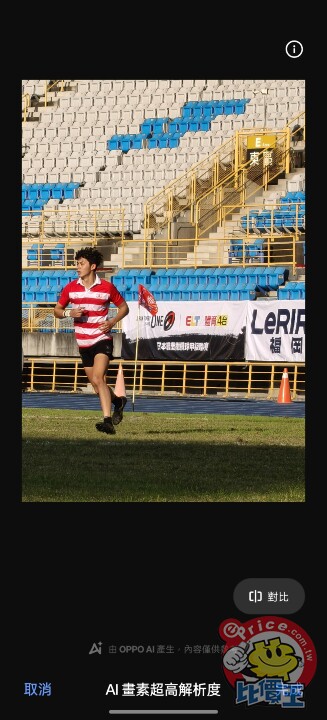
先從 AI 畫素高解析度開始分享起,這項功能很適合用在裁切照片後,讓模糊的照片變得更清晰時使用,比方說像下圖,我們帶著 Reno13 Pro 去拍球賽,雖然說 Reno13 Pro 本身已經配備三顆高畫素鏡頭,切換到 3.5x 長焦鏡可以拍得很遠,但球場最遠處超過百公尺,這時候如果想要裁切照片調整構圖的話,還是會遇到畫素不足、或是畫面不夠清晰的情況,但只要從編輯中點選 AI 畫素超高解析度,手機就會透過 AI 來補足照片中細節不足的地方,同時提高銳利度,讓照片變得更清晰。
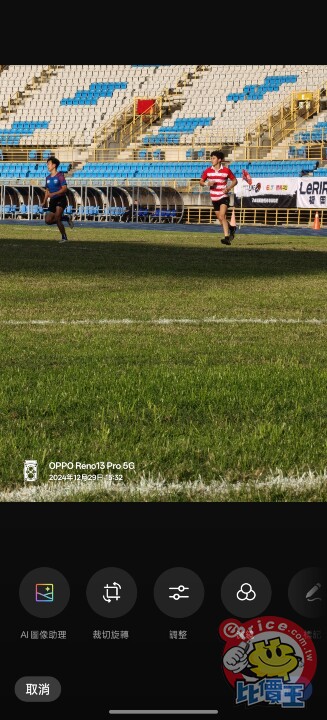
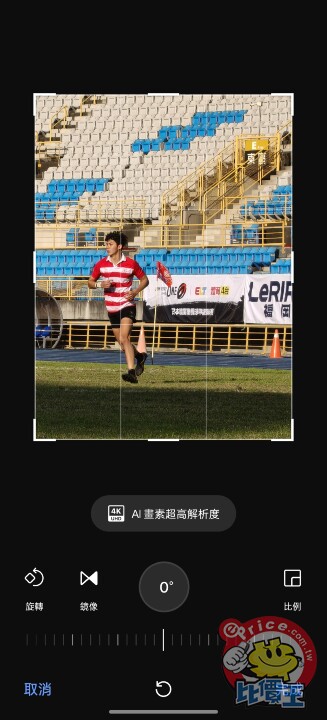
就像這樣,經過幾秒鐘的演算,即使是裁切後解析度較不足的照片,也可以透過 AI 畫素超高解析度來提高畫面清晰度。
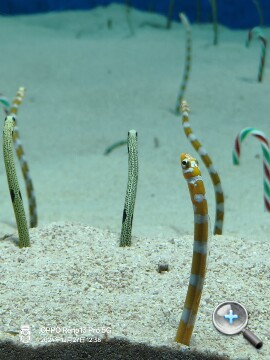
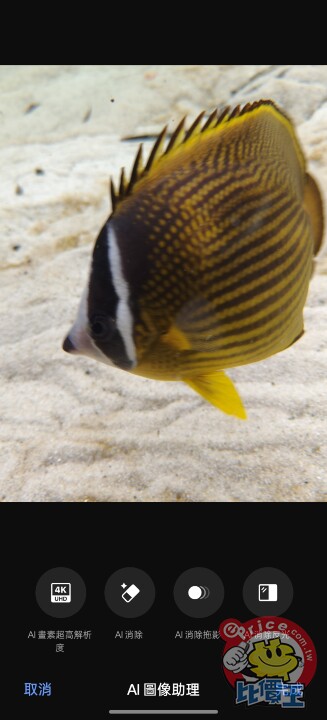
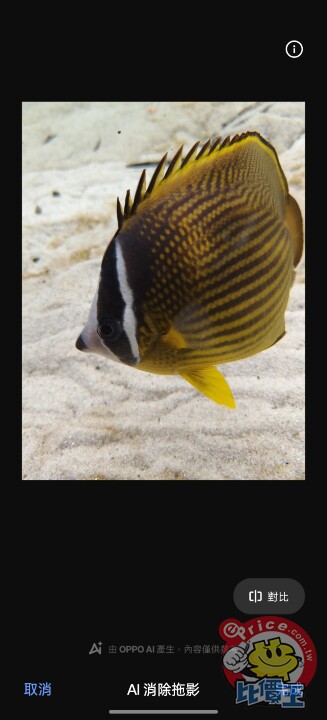
AI 消除拖影適合用在拍攝快速移動的物體上,消除物體移動產生的殘影,比方說像是拍水族館裡的魚,在比較昏暗的環境下,相機的快門速度通常會放得比較慢才能有足夠的進光量,不過遇上游的比較快的魚就容易有殘影,這時候如果是用 Reno13 Pro 拍攝的話,只要在拍攝完後按一下 AI 消除拖影,經過幾秒鐘的 AI 運算後,拖影的部分就會被消除,效果非常自然。
比方說下左圖,魚游過去拍起來有點糊糊的,這時候只要使用 AI 消除拖影功能就可以讓模糊的拖影變得清晰。
AI 消除反光很適合用在隔著玻璃窗拍攝或是拍攝的畫面裡有會反光的玻璃等情境,只要使用 AI 消除反光功能,AI 就會判斷畫面裡有哪些元素反射了後方的光線,接著自動消除那些反光,生成自然的畫面填補。
比方說像拍攝水面,雖然想要把鱟拍清楚,但水面波光粼粼會被拍下來,這時候只要使用 AI 消除反光功能就可以消除水面反光。


另一個例子則是室內的玻璃窗常常會反射燈光,也可以透過 AI 消除反光功能來消除玻璃上的反光。


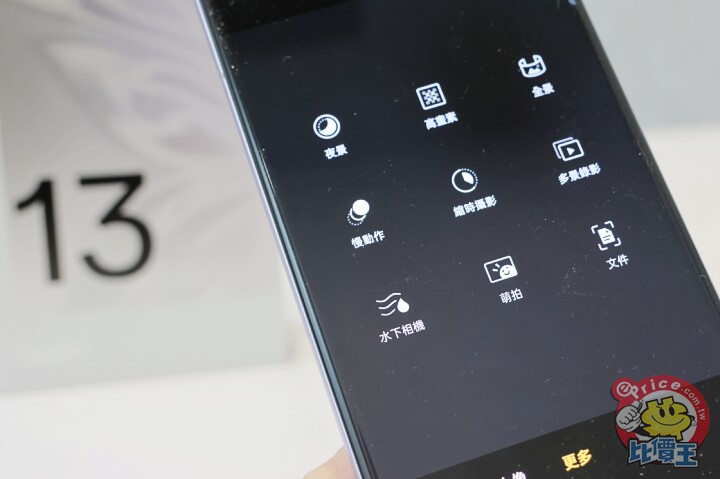
Reno13 Pro 看齊旗艦機 Find X8 系列,配備了 IP68、IP69 防塵防水設計,也就是手機完全浸入靜止清水中,深度為 1.5 公尺、持續 30 分鐘後拿起來也能正常使用,為了讓防水功能可以發揮最大的功用,OPPO 在 Reno13 Pro 中加入了水下相機模式。
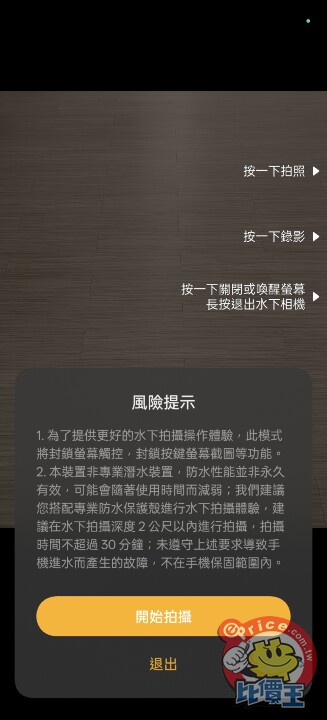
▲切換到水下相機模式之後會跳出教學和提醒,告知使用者可以把音量鍵當成拍照和錄影按鍵,以及在水下模式會封鎖螢幕觸控功能,且建議在水深兩公尺內的環境拍攝。
切換到水下相機模式後,音量大聲鍵可以當作拍照按鈕使用,音量小聲鍵可當作錄影鍵使用,這樣直接把手機放到水底下就能直接拍照或錄影了。
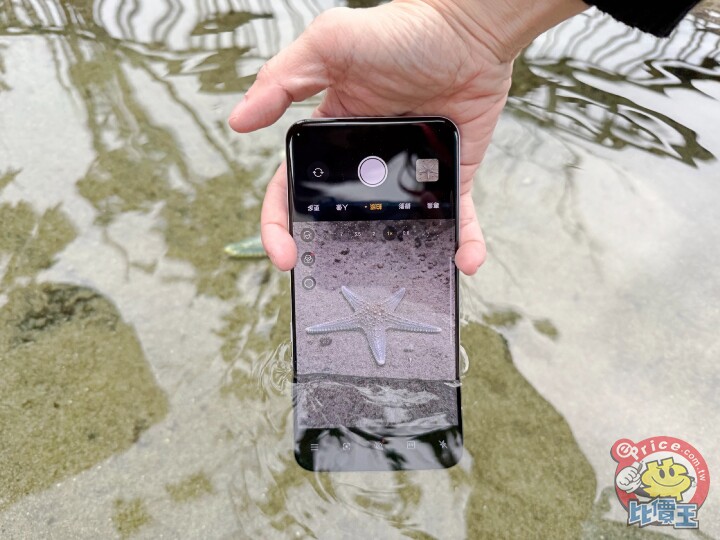
我們實際帶著 OPPO Reno13 Pro 到水族館的動物互動體驗區測試,直接把手機放到水裡就能拍攝了,不需要另外套防水殼。 在水下相機模式會套用水攝專用濾鏡,還原水下拍攝影像的色彩和清晰度,拍起來效果還滿好的,如果去河邊玩、泳池玩,就可以利用 Reno13 Pro 直接在水裡拍照,不用額外多帶防水殼或是運動相機出門,一台 Reno13 Pro 就可以滿足!
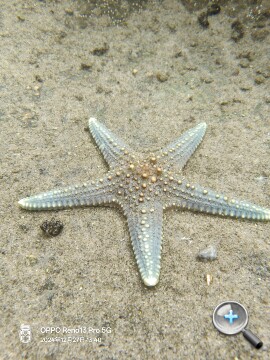
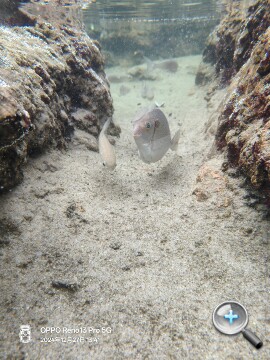
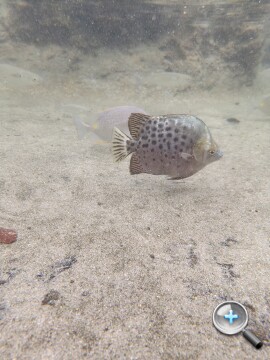
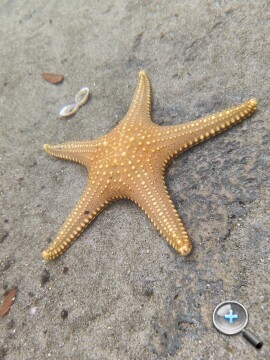
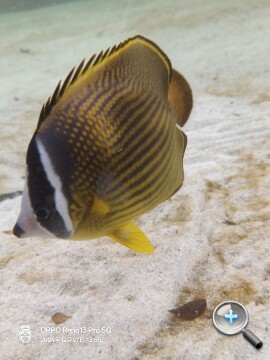
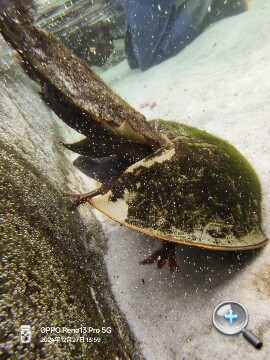
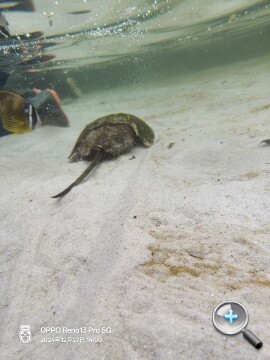
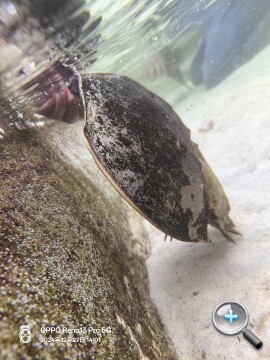
拍完後上岸手機會啟動排水程序,透過聲音把喇叭裡的水向外排出,上岸後記得也要將充電埠擦乾,這樣充電比較安全。
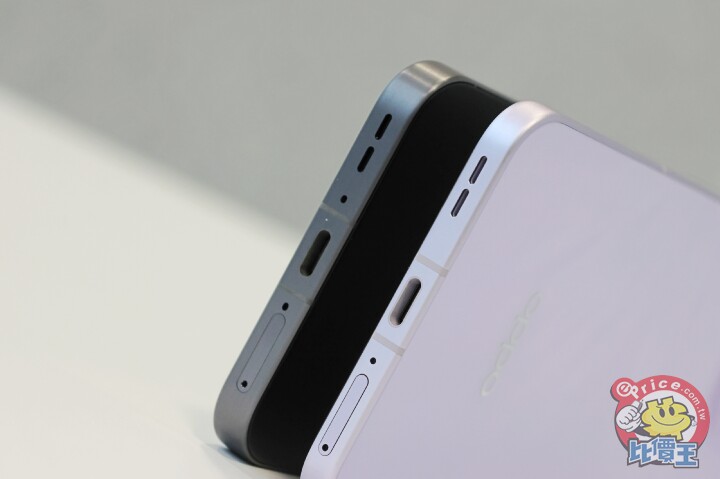
▲雖然手機有防水設計,不過從水中離開時還要要擦乾喇叭、連接埠等處。
最後,Reno13 Pro 和 Find X8 到底該怎麼選呢?對比前一代 Reno12 Pro,Reno13 Pro 的升級幅度還滿大的,三顆不同焦段鏡頭的配置可以滿足大部分使用者日常拍攝需求,出遊時帶著 Reno13 Pro 拍照更是可以留下各式各樣的旅行紀錄,特別是像是去河邊、泳池、或是水族館等景點,還可以利用 Reno13 Pro 的水下相機功能直接下水拍攝,就算沒帶防水殼也沒關係。
如果想要頂尖的拍照效果,或是想要嘗試哈蘇獨特韻味的拍攝體驗的話,當然就是直上 Find X8 啦!特別是喜歡拍攝人像照的朋友,OPPO 美顏演算法在智慧型手機中表現一直是數一數二好的,加上哈蘇獨特的色調風格,可以拍出非常有韻味的人像照,但如果想要一款大螢幕、大電量、拍攝表現又好的全方位均衡手機,Reno13 Pro 就是好選擇。

▲左:OPPO Find X8,右:OPPO Reno13 Pro。

▲左為 6.83 吋配備懸浮螢幕的 OPPO Reno13 Pro,右為 6.59 吋的 OPPO Find X8。
潛望式長焦鏡到超廣角都有的拍照手機
OPPO Find X8 和 Reno13 Pro 相機都是採用超廣角、廣角、長焦三鏡頭配置,Find X8 採用 5000 萬畫素 f/1.8 主鏡頭(1/1.56 吋感光元件、24mm 等效焦距)、5000 萬畫素 f/2.6 三倍潛望式長焦鏡頭(1/1.95 吋感光元件、73mm 等效焦距)、5000 萬畫素 f/2.0 超廣角鏡頭(1/2.75 吋感光元件、15mm 等效焦距);而 Reno13 Pro 則是採用 5000 萬畫素 f/1.8 主鏡頭(1/1.56 吋感光元件、24mm 等效焦距)、5000 萬畫素 3.5x 倍潛望式長焦鏡頭(80mm 等效焦距)、800 萬畫素 f/2.0 超廣角鏡頭。

▲Reno13 Pro 和 Find X8 一樣都採用三鏡頭配置,滿足使用者從超廣角到望遠的拍攝需求。
單從鏡頭配置來說,兩款機型的設計概念滿相近的,可以滿足消費者日常拍攝的需求,特別是配置了潛望式長焦鏡頭,在兼顧機身輕薄的同時又能拍得更遠更清晰,適合用在拍攝演唱會或是球賽,捕捉歌手或球員更清晰。


主鏡頭部分 Find X8 和 Reno13 Pro 皆採用 1/1.56 吋的大感光元件,拍攝表現也頗相似,整體發色偏向明亮色調感,不會太過鮮豔,特別是在人像拍攝上,在人物膚色處理和背景散景過渡處理得非常好,很能拍出雜誌大片感,主要差異則是有無哈蘇風格和 X-Pan 模式可以套用,就這點來說 OPPO 在 Reno13 Pro 的配置上真的是滿大方的,直接上看 Find X8 規格,讓使用者可以體驗旗艦級的拍攝感受。


提供幾組 Reno13 Pro 和 Find X8 拍攝對比照供參考,看浮水印就可以知道是由 Reno13 Pro 或是 Find X8 拍攝,在同個場景下,如果是用主鏡頭拍攝兩者的表現還滿相近的,長焦鏡頭的表現 Find X8 在哈蘇加持和演算法調整之下,虛化效果更明顯且自然,不過 Reno13 Pro 表現也不俗,同樣能拍出高品質人像照。


▲主鏡頭拍攝。


▲長焦鏡頭拍攝。


▲主鏡頭拍攝。


▲主鏡頭拍攝。


▲長焦鏡頭拍攝。


▲長焦鏡頭拍攝。


▲主鏡頭拍攝。


▲主鏡頭拍攝。


▲主鏡頭拍攝。


▲長焦鏡頭拍攝。


▲主鏡頭拍攝。


▲主鏡頭拍攝。


▲長焦鏡頭拍攝。


▲長焦鏡頭拍攝。
此外,Reno13 Pro 新增實況照片功能,按一下拍攝選單上的圓圈就可以拍攝實況照片,保留約三秒當時拍攝的動態場景。

拍攝升級,看齊 Find X8 Pro 導入更多 AI 應用
OPPO Reno13 Pro 不少功能直接上看旗艦級的 Find X8,特別是在 AI 應用方面,跟隨著 OPPO 的 AI 政策,在手機裡加入眾多生成式 AI 功能,比方說 AI 寫真館 2.0,只要上傳一張自拍照,AI 就會自動判斷照片中的人臉輪廓,這時候只要選擇自己想要轉換的照片風格就可以得到一組全新的 AI 照片了。
購買 OPPO Reno13 Pro 登入 OPPO 帳號之後,OPPO 就會先贈送 5000 點點數可以體驗 AI 寫真館 2.0 功能,每天簽到的話可以領取更多點數,每生成一組 AI 照片需要十點,只要選擇一張想要生成的照片,按下「開始產生」後,AI 寫真館 2.0 就會自動產生一組選定的照片風格。


像是不論要產生狂歡節風格的照片,或是把自己的頭像套用英倫風格都可以。


Reno13 Pro 和 Find X8 一樣,具備豐富的 AI 修圖功能,包含 AI 畫素超高解析度、AI 消除拖影、AI 消除反光等。
先從 AI 畫素高解析度開始分享起,這項功能很適合用在裁切照片後,讓模糊的照片變得更清晰時使用,比方說像下圖,我們帶著 Reno13 Pro 去拍球賽,雖然說 Reno13 Pro 本身已經配備三顆高畫素鏡頭,切換到 3.5x 長焦鏡可以拍得很遠,但球場最遠處超過百公尺,這時候如果想要裁切照片調整構圖的話,還是會遇到畫素不足、或是畫面不夠清晰的情況,但只要從編輯中點選 AI 畫素超高解析度,手機就會透過 AI 來補足照片中細節不足的地方,同時提高銳利度,讓照片變得更清晰。


就像這樣,經過幾秒鐘的演算,即使是裁切後解析度較不足的照片,也可以透過 AI 畫素超高解析度來提高畫面清晰度。


AI 消除拖影適合用在拍攝快速移動的物體上,消除物體移動產生的殘影,比方說像是拍水族館裡的魚,在比較昏暗的環境下,相機的快門速度通常會放得比較慢才能有足夠的進光量,不過遇上游的比較快的魚就容易有殘影,這時候如果是用 Reno13 Pro 拍攝的話,只要在拍攝完後按一下 AI 消除拖影,經過幾秒鐘的 AI 運算後,拖影的部分就會被消除,效果非常自然。
比方說下左圖,魚游過去拍起來有點糊糊的,這時候只要使用 AI 消除拖影功能就可以讓模糊的拖影變得清晰。


AI 消除反光很適合用在隔著玻璃窗拍攝或是拍攝的畫面裡有會反光的玻璃等情境,只要使用 AI 消除反光功能,AI 就會判斷畫面裡有哪些元素反射了後方的光線,接著自動消除那些反光,生成自然的畫面填補。
比方說像拍攝水面,雖然想要把鱟拍清楚,但水面波光粼粼會被拍下來,這時候只要使用 AI 消除反光功能就可以消除水面反光。


另一個例子則是室內的玻璃窗常常會反射燈光,也可以透過 AI 消除反光功能來消除玻璃上的反光。


水中相機模式,用另外一種視角紀錄旅行
Reno13 Pro 看齊旗艦機 Find X8 系列,配備了 IP68、IP69 防塵防水設計,也就是手機完全浸入靜止清水中,深度為 1.5 公尺、持續 30 分鐘後拿起來也能正常使用,為了讓防水功能可以發揮最大的功用,OPPO 在 Reno13 Pro 中加入了水下相機模式。


▲切換到水下相機模式之後會跳出教學和提醒,告知使用者可以把音量鍵當成拍照和錄影按鍵,以及在水下模式會封鎖螢幕觸控功能,且建議在水深兩公尺內的環境拍攝。
切換到水下相機模式後,音量大聲鍵可以當作拍照按鈕使用,音量小聲鍵可當作錄影鍵使用,這樣直接把手機放到水底下就能直接拍照或錄影了。

我們實際帶著 OPPO Reno13 Pro 到水族館的動物互動體驗區測試,直接把手機放到水裡就能拍攝了,不需要另外套防水殼。 在水下相機模式會套用水攝專用濾鏡,還原水下拍攝影像的色彩和清晰度,拍起來效果還滿好的,如果去河邊玩、泳池玩,就可以利用 Reno13 Pro 直接在水裡拍照,不用額外多帶防水殼或是運動相機出門,一台 Reno13 Pro 就可以滿足!


拍完後上岸手機會啟動排水程序,透過聲音把喇叭裡的水向外排出,上岸後記得也要將充電埠擦乾,這樣充電比較安全。

▲雖然手機有防水設計,不過從水中離開時還要要擦乾喇叭、連接埠等處。
小結
最後,Reno13 Pro 和 Find X8 到底該怎麼選呢?對比前一代 Reno12 Pro,Reno13 Pro 的升級幅度還滿大的,三顆不同焦段鏡頭的配置可以滿足大部分使用者日常拍攝需求,出遊時帶著 Reno13 Pro 拍照更是可以留下各式各樣的旅行紀錄,特別是像是去河邊、泳池、或是水族館等景點,還可以利用 Reno13 Pro 的水下相機功能直接下水拍攝,就算沒帶防水殼也沒關係。
如果想要頂尖的拍照效果,或是想要嘗試哈蘇獨特韻味的拍攝體驗的話,當然就是直上 Find X8 啦!特別是喜歡拍攝人像照的朋友,OPPO 美顏演算法在智慧型手機中表現一直是數一數二好的,加上哈蘇獨特的色調風格,可以拍出非常有韻味的人像照,但如果想要一款大螢幕、大電量、拍攝表現又好的全方位均衡手機,Reno13 Pro 就是好選擇。
廣告

網友評論 0 回覆本文